Cart
0
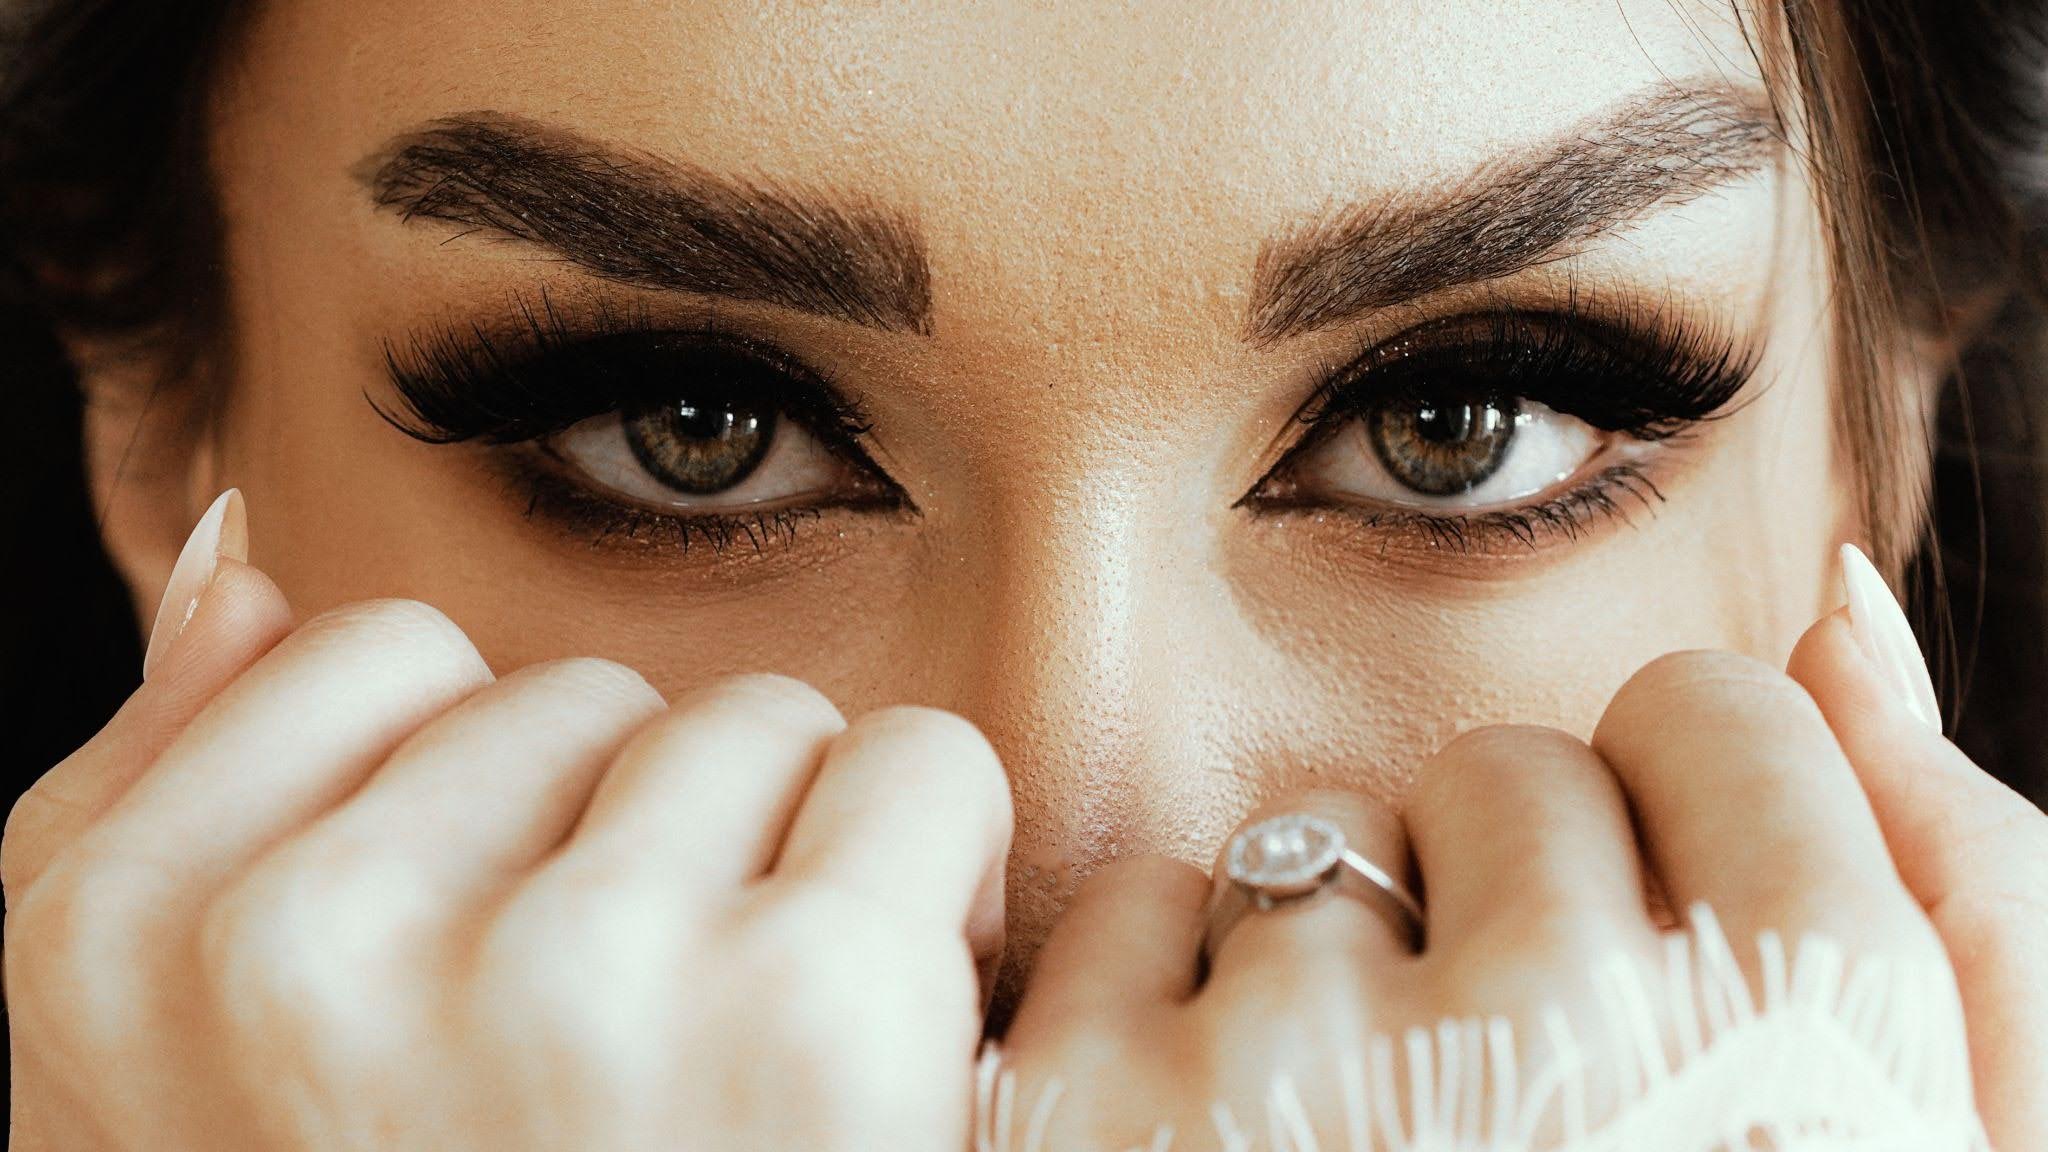
Beautiful lash work deserves beautiful photos. A lash set may look stunning in person, but if the photo is blurry, dark, or taken from the wrong angle, it will not show the true quality of your work.
This is why lash photography is so important for professional lash artists. Good photos help you attract new clients, build trust, show your skill, and create stronger content for Instagram, your website, and your booking page.
Clients often decide whether to book based on what they see online. If your photos look clean, clear, and professional, your lash services instantly feel more polished and luxury.
Why Lash Photography Matters
Lash photography is one of the best ways to market your lash business. Lash extensions are visual, so potential clients want to see real results before they trust someone with their eyes.
A good lash photo can show your mapping, direction, curl choice, lash line, texture, and overall styling. It can also show the difference between classic lashes, hybrid lashes, volume lashes, wet look lashes, and angel lashes.
Poor photos can make even excellent work look average. Bad lighting can hide detail. Harsh angles can distort the lash map. Over-editing can make the results look unrealistic.
Professional lash artists need photos that show the true quality of their work. Strong lash photography helps clients understand your style and feel more confident booking with you.
Start with Clean, Brushed Lashes
Before taking any lash photo, the lashes should be clean, dry, and brushed into place. Even a beautiful lash set can look messy if the lashes are not sitting correctly.
Use a clean spoolie to gently brush through the lashes before taking the photo. Make sure the fans are open where they should be, the spikes are visible, and the lash direction looks neat.
If the client has watery eyes, makeup smudges, or residue around the lash line, clean the area carefully before taking photos. Small details matter in close-up images.
Good lash photography starts before the camera comes out. The lashes should look fresh, polished, and ready to be shown.
Use Good Lighting
Lighting is one of the biggest factors in lash photography. Without good lighting, your lash photos may look dull, shadowy, or unclear.
Soft, bright lighting usually works best. A ring light, beauty light, or natural daylight can help show the lashes clearly. The goal is to brighten the eyes without creating harsh shadows or glare.
If the light is too yellow, the photo may look warm and unprofessional. If the light is too harsh, it may create strong shadows around the eyes. If the light is too dim, the lash detail may disappear.
Professional lash artists should aim for clean, even lighting that shows the lash line, curl, and texture clearly.
Natural Light vs Ring Light
Natural light can create soft and flattering lash photos, especially if taken near a window. It can make the skin look fresh and help the lashes appear clean and natural.
However, natural light is not always reliable. It changes throughout the day and may not be strong enough during cloudy weather or evening appointments.
A ring light or beauty light gives more control. It allows lash artists to take consistent photos at any time of day. This is especially helpful for salons, home studios, or lash rooms without much daylight.
For the best lash photography, many lash artists use a professional beauty light and adjust the angle until the lashes are bright but not washed out.
Choose the Right Background
The background should not distract from the lashes. Since lash photos are usually close-up, the main focus should be the eyes and lash set.
A clean treatment bed, neutral blanket, simple wall, or soft salon background can work well. Avoid clutter, product mess, cables, or anything that makes the photo look untidy.
Luxury lash photos should feel clean and professional. Even if the lash set is beautiful, a messy background can reduce the quality of the image.
Simple backgrounds help the lashes stand out and make your content look more polished.
Best Angles for Lash Photography
Angles can completely change how a lash set looks. The right angle can show lift, texture, density, and mapping. The wrong angle can make lashes look uneven or hide the shape.
A front-facing angle is good for showing the overall style and how the lashes frame the eyes. A side angle is useful for showing curl, length, and lift. A closed-eye angle helps show the lash map, lash line, and fan placement.
Looking-down photos are especially popular because they show the full lash set clearly. They are great for showing volume lashes, angel lashes, wet look lashes, and wispy styles.
The best lash photography usually includes more than one angle so clients can see the full result.
The Looking-Down Lash Photo
The looking-down photo is one of the most flattering lash angles. It shows the length, texture, and shape of the lash set while keeping the client’s eyes relaxed.
To take this photo, ask the client to gently look down without fully closing their eyes. The camera should be positioned slightly above or in front of the client so the lash line is visible.
This angle works well for showing clean lash mapping and beautiful direction. It is especially useful for textured styles like wet look lashes and angel lashes.
Good lighting is important for this shot because shadows can fall over the eyes if the light is placed incorrectly.
The Closed-Eye Lash Photo
Closed-eye photos are perfect for showing technical detail. They reveal the lash map, fan placement, inner corners, outer corners, and overall neatness of the set.
This angle is useful for professional content because it shows the quality of the application. Other lash artists may notice clean direction, even spacing, and smooth styling.
Closed-eye photos also work well for educational posts. You can use them to explain lash maps, curls, lengths, and different styles.
For clean lash photography, make sure the eye pads are removed or positioned neatly. The skin around the eyes should look clean and the lashes should be brushed into place.
The Side Angle Lash Photo
Side angle photos show curl and lift beautifully. They are great for showing how the lashes open the eye and enhance the client’s natural features.
This angle works especially well for clients with long lashes, strong curl, or dramatic styling. It can also show how soft and lightweight the extensions look from the side.
When taking a side angle photo, avoid getting too close in a way that distorts the lashes. Keep the image sharp and make sure the lash line is in focus.
Side shots can make your lash content feel more professional because they show the set from a different perspective.
Use a Lash Mirror for Better Photos
A lash mirror is a useful tool for lash photography because it helps capture angles that may be harder to photograph directly.
With a lash mirror, you can show the underside of the lash line, the curl, and the density of the set. This can be helpful for showing clean attachment and full coverage.
Mirror shots can also make your content look more creative. They are popular on Instagram because they give a close-up view of the lash work.
A clean mirror is essential. Any fingerprints, dust, or adhesive marks can show up in the photo and make it look less professional.
Focus on the Eyes
Sharp focus is essential in lash photography. The lashes and eyes should be clear, not blurry.
Most phone cameras allow you to tap the screen to focus. Tap on the lash line or eye area before taking the photo. Hold the camera steady and avoid rushing the shot.
If the image is slightly out of focus, it may not show your work properly. Blurry photos can make the lash set look less clean than it really is.
Taking a few extra seconds to focus can make a big difference to the final image.
Keep the Skin and Eye Area Natural
Editing should enhance the photo, not completely change it. Clients want to see real results, and over-edited photos can reduce trust.
It is fine to adjust brightness, sharpness, and contrast slightly, but avoid changing the lash shape, adding fake density, or smoothing the skin so much that the photo looks unrealistic.
The eye area should look clean and polished, but still natural. A luxury lash photo should feel honest and professional.
Good lash photography shows your real work clearly. It should not mislead clients about what they can expect.
Avoid Over-Editing Lash Photos
Over-editing is one of the most common mistakes lash artists make. Too much sharpening can make lashes look harsh. Too much smoothing can blur the lash line. Too much contrast can make the set look darker than it really is.
Filters can also change the colour and quality of the image. A heavy filter may make your Instagram feed look less professional.
Simple editing is usually best. Brighten the image, adjust shadows if needed, crop the photo neatly, and keep the lash set looking true to life.
Professional lash photography should make your work look clear, not fake.
Take Before and After Photos
Before and after photos are powerful because they show transformation. They help potential clients understand the difference lash extensions can make.
A before photo should be taken with the same care as the after photo. Use similar lighting, angle, and distance so the comparison looks fair and professional.
Before and after photos work well for classic lashes, hybrid lashes, volume lashes, lash lifts, and correction sets. They also help show how different lash styles can change the appearance of the eyes.
These photos are great for Instagram, website galleries, and booking pages because they show clear value.
Show Different Lash Styles
Your photo gallery should show variety. Clients may not know the difference between lash styles, so your photos can help them choose.
Post examples of classic lashes, hybrid lashes, volume lashes, wet look lashes, angel lashes, wispy lashes, and soft natural sets. Each style should be photographed clearly so clients can see the difference.
This also helps attract different types of clients. Some may want natural lashes, while others may want fuller or more textured sets.
Good lash photography helps clients understand your service menu without needing a long explanation.
Take Photos for Lash Maps
Lash map photos are useful for education and marketing. A clear closed-eye or looking-down photo can show how lengths and curls are placed across the lash line.
These photos are especially helpful for styles like angel lashes, wet look lashes, squirrel lashes, cat-eye lashes, and doll-eye lashes.
Lash map content can also attract other lash artists who enjoy educational posts. This can help grow your professional audience and build authority in the lash industry.
For product-focused content, lash map photos can naturally show lash trays, tweezers, lash tape, mapping pens, and other professional supplies.

Keep Your Brand Style Consistent
Consistency makes your Instagram and website look more professional. Try to use similar lighting, angles, editing style, and photo quality across your lash content.
This does not mean every photo should look exactly the same. It simply means your content should feel connected and polished.
A clean visual style helps create a luxury brand feel. When someone visits your page, they should quickly understand your quality, style, and professionalism.
Consistent lash photography helps your business look more trustworthy and established.
Common Lash Photography Mistakes
One common mistake is taking photos too quickly at the end of the appointment. If the lashes are not brushed, the eyes are watery, or the lighting is poor, the final photo may not show your best work.
Another mistake is using cluttered backgrounds. Even small details in the background can make the image feel less professional.
Some lash artists also take photos too close to the face, which can distort the eyes and lashes. Others rely too much on filters, which can make results look unrealistic.
Poor focus is another issue. If the lash line is blurry, clients will not see the detail of your work.
Avoiding these mistakes can make your content look cleaner and more luxury.
How Lash Photography Helps You Get More Clients
Strong lash photography helps potential clients trust your work before they book. It shows your skill, your style, and the quality of your service.
When clients see clear photos of beautiful lash sets, they can imagine themselves with similar results. This makes them more likely to message, book, or follow your page.
Good photos also help you create better social media content. Lash reels, carousels, before and after posts, and style guides all perform better when the photos are clear and attractive.
For lash artists selling or using luxury lash supplies, professional photos also help show the quality of the products. Clean lashes, sharp tweezers, neat mapping, and beautiful results all support the image of a premium lash brand.
Final Thoughts
Lash photography is an important skill for every professional lash artist. Beautiful photos help you show your work, attract clients, build trust, and create stronger content for your lash business.
The best lash photos use clean lighting, flattering angles, sharp focus, simple backgrounds, and natural editing. They show the lashes clearly without making the results look fake.
Whether you are photographing classic lashes, hybrid lashes, volume lashes, wet look lashes, or angel lashes, your photos should reflect the quality of your work.
With good lighting, clean styling, the right angles, and a consistent look, lash photography can help turn your lash sets into powerful marketing content.
FAQs
Why is lash photography important?
Lash photography is important because it helps lash artists show their work, attract new clients, build trust, and create professional content for Instagram, websites, and booking pages.
What is the best angle for lash photos?
The best angles include looking-down photos, closed-eye photos, front-facing photos, and side angle photos. Each angle shows a different part of the lash set.
What lighting is best for lash photography?
Soft, bright lighting works best. Natural daylight, ring lights, and beauty lights can all help create clear lash photos when used correctly.
Should lash photos be edited?
Yes, lash photos can be lightly edited for brightness, sharpness, and cropping. However, they should not be over-edited or changed in a way that misrepresents the real result.
How can lash artists take better Instagram photos?
Lash artists can take better Instagram photos by using good lighting, brushing the lashes, choosing clean backgrounds, focusing on the lash line, using flattering angles, and keeping editing natural.